What Selection Criteria Matter Most for Commercial Lighting?
Time
Click Count
The most important selection criteria for commercial lighting are the quality and distribution of light, visual comfort, control compatibility, verified safety suitability, and performance over the installation’s working life. Energy efficiency and purchase price matter, but they become useful comparisons only after a fixture meets the space’s lighting requirements. A highly efficient luminaire that produces distracting glare or leaves merchandise in shadow is a poor fit.
Start by defining what must be illuminated, from which viewing positions, and under which operating conditions. Then compare fixtures against those requirements using photometric files, technical documentation, and a representative installation. This sequence prevents attractive specifications from hiding problems that become expensive after ceilings, wiring, and control systems are complete.
Define the lighting task before comparing products
A lighting schedule needs more detail than room dimensions and a preferred fixture style. Record ceiling height, mounting position, surface finishes, task locations, operating hours, and exposure to moisture, dust, or heat. Dark finishes absorb more light than pale surfaces, while glossy counters and polished floors create reflections that affect fixture placement.
Separate the lighting tasks within each space. Circulation lighting supports movement; task lighting serves work surfaces; accent lighting draws attention to displays; vertical lighting makes shelves, walls, and faces visible. One fixture type rarely handles all four equally well. A uniform grid of downlights, for example, can leave shelving poorly illuminated despite adequate light on the floor.
Set measurable acceptance criteria for each zone using applicable project guidance and local requirements. Specify the relevant measurement plane, required uniformity, and any limits on glare or spill light. Avoid copying a single illuminance target across an entire building: a reception counter, storage aisle, and screen-based workspace have different visual demands.
Judge delivered light, not just lumens and watts
Lumen output describes the total light leaving a luminaire. It does not show where that light lands. Beam shape, mounting height, spacing, and aiming determine whether the output reaches the intended surface. Two fixtures with similar lumen ratings can produce very different results on a display wall or desk.
Request a photometric file corresponding to the proposed model, optic, output setting, and accessories. A file for another beam option or a bare fixture without its specified louver can distort the lighting calculation. The calculation should also represent actual room geometry and realistic surface reflectances.
Beam angle alone is an incomplete description of distribution. Narrow beams concentrate light and create stronger highlights, but increase sensitivity to aiming and spacing. Wide beams spread light across larger areas, with more opportunity for spill and overlap. Asymmetric optics are useful where light must reach a vertical surface from an offset mounting position.
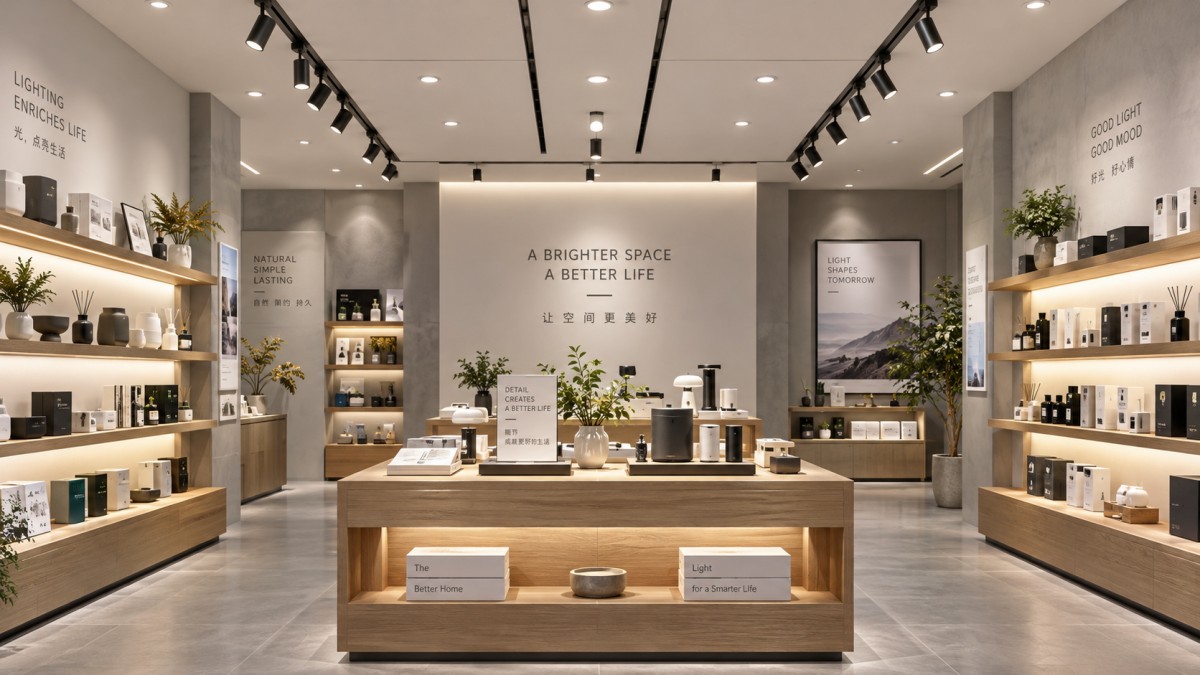
Examine the pattern between fixtures as well as directly beneath them. Bright pools separated by darker gaps indicate a distribution or spacing problem; increasing output can make the contrast stronger. On shelving, inspect the lower shelves and merchandise faces. On walls, look for scalloping and uneven brightness that a horizontal illuminance calculation will miss.
Use maintained light levels when assessing long-term performance. Initial output declines with LED aging and accumulated dirt. Any maintenance factor used in a calculation should reflect the operating environment, cleaning schedule, and available performance evidence. An optimistic assumption can make an undersized installation appear acceptable.
Resolve glare from actual viewing positions
Glare often becomes the deciding criterion once sufficient illumination is established. It is influenced by the brightness of the visible emitting surface, its apparent size, background brightness, and position within the field of view. A small, intense source in a dark ceiling can feel uncomfortable even when average illuminance is moderate.
Recessed sources, shielding, louvers, and suitable optical distributions help control direct visibility, but each changes light delivery. Deep shielding can reduce high-angle light while limiting coverage. A diffuser softens the appearance of individual LEDs, yet a large, bright panel can still be distracting when positioned in a sensitive sightline.
Treat a published unified glare rating, or UGR, as information tied to calculation conditions. It is not a universal property that guarantees comfort in every room. Room proportions, fixture arrangement, reflectances, and observer position affect the result. Compare the calculation assumptions with the proposed installation before accepting a low-glare claim.
Reflected glare needs separate attention. A fixture outside the direct line of sight can appear on a monitor, glass partition, or polished worktop. Evaluate representative seated and standing positions, including views toward counters and displays. A mock-up with actual finishes is particularly valuable where reflections are difficult to predict from drawings.
Select color quality for the materials being illuminated
Correlated color temperature describes the apparent warmth or coolness of white light. It does not describe how faithfully colors appear. Select color temperature in relation to interior finishes, adjacent lighting, daylight, and the intended atmosphere, then assess color rendering separately.
The general color rendering index, CRI, provides a useful starting point, but its average value does not fully describe saturated colors. Where red fabrics, skin tones, food, or warm wood finishes matter, examine additional color-rendering information, such as the saturated red index R9 or a broader color-fidelity report. Compare this evidence with physical samples under the proposed fixture.
Matching nominal color temperature also does not guarantee matching appearance. Differences in chromaticity can make adjacent fixtures look pinkish or greenish. Establish an acceptable color-consistency tolerance, commonly expressed through SDCM or MacAdam ellipse steps, especially for continuous runs, wall washing, and repeated fixtures within one sightline.
Consider replacement behavior as well. A new module installed beside aged fittings can differ in brightness and color even if its original specification matches. Consistent component sourcing, documented product revisions, and an agreed replacement strategy reduce visible patchwork over time.
Prove that fixtures and controls work together
A fixture described as “dimmable” still needs to match the selected control method. Phase-cut dimming, analog control, and digital control systems use different interfaces. Compatibility depends on the driver, control hardware, wiring arrangement, and sometimes configuration or firmware. A protocol name alone does not establish complete interoperability.
Obtain compatibility evidence for the exact driver and control combination. Evaluate low-end behavior, fade quality, startup, and switching as well as full-output operation. A system that dims smoothly through most of its range can still flicker, drop out, or jump in brightness near its minimum setting.
Temporal light modulation also deserves attention at different dimming levels. A statement such as “flicker-free” is difficult to assess without a measurement method and operating conditions. Request documented test information, then observe the proposed setup at the settings used in the space. If cameras are involved, test with representative shutter settings because visible comfort and camera banding are different acceptance questions.
Control zoning should follow actual activity and daylight exposure. Combining perimeter fixtures and deep interior fixtures on one daylight-controlled circuit creates competing needs. Occupancy sensors also require suitable coverage, timeout settings, and detection behavior; poor placement can cause lights to switch off during low-motion work.
For connected systems, establish what happens after a power interruption, network loss, or controller replacement. Configuration backup, local overrides, and access to commissioning tools affect whether routine changes remain manageable throughout the installation’s life.
Use efficiency and lifecycle cost on a comparable basis
Compare luminaire efficacy using complete-fixture output and input power. LED chip efficacy excludes losses from drivers, optics, thermal conditions, and other components. It can therefore overstate the performance of the installed product.
Higher luminaire efficacy is useful when distribution and visual quality also meet the brief. A fixture with lower efficacy can require less total installed power if its optics deliver light more effectively to the target. Compare the proposed layouts at equivalent maintained lighting performance rather than selecting the highest lumens-per-watt value in isolation.
Operating hours change the financial importance of energy consumption. Long daily schedules give energy and control performance greater weight; difficult access increases the importance of maintenance labor. Use project-specific tariffs and schedules instead of generic savings claims.
Verify suitability, serviceability, and specification evidence
Safety and installation suitability are acceptance gates. Confirm the requirements applicable to the installation location and obtain supporting documentation for the exact product variant. A family-level brochure or a mark shown in a catalog is insufficient evidence when voltage, driver, enclosure, or mounting configuration differs.
Match ingress protection to the actual exposure. Dust, water splashes, cleaning methods, and outdoor conditions create different demands. An ingress rating does not establish resistance to corrosive chemicals or suitability for every washing procedure. Where these conditions apply, request explicit material and environmental compatibility information.
Thermal conditions affect both output and durability. Verify the permitted ambient temperature, clearances, and installation restrictions, including any requirements concerning insulation contact. A driver enclosed in a hot ceiling cavity operates under different conditions from one tested in an open, temperature-controlled setting.
Interpret lifetime claims carefully. LED lumen-maintenance projections describe gradual output depreciation under stated conditions; they do not establish the survival of drivers, connectors, seals, or control electronics. Request the basis of the claim and its temperature assumptions. Read warranty terms for coverage of labor, access costs, and exclusions, since replacement hardware alone may represent a small part of a repair.
Serviceability should be visible in the product design. Determine whether a failed driver or light engine can be replaced without removing surrounding finishes. Record connector types, component identifiers, and access requirements. For sealed or integrated fittings, evaluate the consequences of replacing the complete unit, including whether a matching product will remain available.
Approve the exact configuration through a representative trial
Before committing to a large quantity, install a sample using the proposed mounting height, optic, driver, controls, and surrounding materials. Include the most demanding conditions: a reflective surface, a critical display, a low dimming scene, or a difficult viewing angle. Compare measured performance with the calculation and inspect what the numbers do not adequately describe.
Resolve discrepancies before approval. Uneven illumination points toward layout or optical changes; unstable dimming calls for driver and control investigation; poor material appearance requires a color-quality review. Raising output will not correct every failure.
The approved specification should identify the model configuration, optical accessories, color characteristics, driver, control interface, finish, and supporting documentation. Substitutions should be assessed against those same requirements. Keeping the tested configuration traceable through ordering and installation prevents a satisfactory sample from being replaced by a superficially similar fixture with different performance.
News Recommendations
 How to assess supplier reliability in global supply chain sourcing
![51a6ab95581761cc26f4318be6520c15]()
Aris Katos
Future of Carbide Coatings
 Omdia Forecasts 11.6% CAGR for Global LED Video Display Market in 2026–2030
![51a6ab95581761cc26f4318be6520c15]()
Aris Katos
Future of Carbide Coatings
 How to verify an LFGB testing laboratory's accreditation scope
![51a6ab95581761cc26f4318be6520c15]()
Aris Katos
Future of Carbide Coatings
 How to assess a workplace interior supplier's installation scope
![51a6ab95581761cc26f4318be6520c15]()
Aris Katos
Future of Carbide Coatings
 What records are needed for an ISO 9001 furniture factory audit?
![51a6ab95581761cc26f4318be6520c15]()
Aris Katos
Future of Carbide Coatings
 How to choose AI marketing tools that work with your existing CRM
![51a6ab95581761cc26f4318be6520c15]()
Aris Katos
Future of Carbide Coatings
 Do freight costs erase savings when buying retail fixtures wholesale?
![51a6ab95581761cc26f4318be6520c15]()
Aris Katos
Future of Carbide Coatings
 Can OEM retail shelf display screens work with your existing CMS?
![51a6ab95581761cc26f4318be6520c15]()
Aris Katos
Future of Carbide Coatings
 How heat buildup affects OEM retail shelf LCD screen reliability
![51a6ab95581761cc26f4318be6520c15]()
Aris Katos
Future of Carbide Coatings
 How to check whether an OEM retail shelf screen fits existing shelving
![51a6ab95581761cc26f4318be6520c15]()
Aris Katos
Future of Carbide Coatings
 What brightness should an OEM shelf LCD screen have for retail use?
![51a6ab95581761cc26f4318be6520c15]()
Aris Katos
Future of Carbide Coatings
 Can smart retail IT solutions for CPG work with legacy POS systems?
![51a6ab95581761cc26f4318be6520c15]()
Aris Katos
Future of Carbide Coatings
 What permit approvals belong in a commercial fitout planning checklist?
![51a6ab95581761cc26f4318be6520c15]()
Aris Katos
Future of Carbide Coatings
 What Selection Criteria Matter Most for Commercial Lighting?
![51a6ab95581761cc26f4318be6520c15]()
Aris Katos
Future of Carbide Coatings
 How Do You Apply Sustainability Standards to a Retail Renovation?
![51a6ab95581761cc26f4318be6520c15]()
Aris Katos
Future of Carbide Coatings
 Which Technical Factors Matter When Comparing Smart Retail Hardware?
![51a6ab95581761cc26f4318be6520c15]()
Aris Katos
Future of Carbide Coatings
 Does Data Transparency Matter When Selecting Consumer Goods Suppliers?
![51a6ab95581761cc26f4318be6520c15]()
Aris Katos
Future of Carbide Coatings
 How Does Commercial Design Differ from Interior Decoration?
![51a6ab95581761cc26f4318be6520c15]()
Aris Katos
Future of Carbide Coatings
 How Long Does It Take to Verify a Commercial Furniture Supplier?
![51a6ab95581761cc26f4318be6520c15]()
Aris Katos
Future of Carbide Coatings
 How to verify compostability claims from a bubble mailer manufacturer
![51a6ab95581761cc26f4318be6520c15]()
Aris Katos
Future of Carbide Coatings
 Will commercial smart infrastructure solutions work with legacy systems?
![51a6ab95581761cc26f4318be6520c15]()
Aris Katos
Future of Carbide Coatings
 How to verify a preschool furniture manufacturer's safety standards
![51a6ab95581761cc26f4318be6520c15]()
Aris Katos
Future of Carbide Coatings
 A technical comparison of semiconductor processes for power devices
![51a6ab95581761cc26f4318be6520c15]()
Aris Katos
Future of Carbide Coatings
 How to verify that a BIFMA ergonomic chair meets the standard
![51a6ab95581761cc26f4318be6520c15]()
Aris Katos
Future of Carbide Coatings
 How to use a CRI value chart when choosing LED lighting
![51a6ab95581761cc26f4318be6520c15]()
Aris Katos
Future of Carbide Coatings
 How to compare hotel aroma diffuser wholesale options by coverage area
![51a6ab95581761cc26f4318be6520c15]()
Aris Katos
Future of Carbide Coatings
 How to prevent O-rings and seals from failing in food equipment
![51a6ab95581761cc26f4318be6520c15]()
Aris Katos
Future of Carbide Coatings
 How to compare commercial linear light wholesale quotes accurately
![51a6ab95581761cc26f4318be6520c15]()
Aris Katos
Future of Carbide Coatings
 How to verify international standards compliance for Middle East exports
![51a6ab95581761cc26f4318be6520c15]()
Aris Katos
Future of Carbide Coatings
 How to select laboratory instruments for reproducible test results
![51a6ab95581761cc26f4318be6520c15]()
Aris Katos
Future of Carbide Coatings
 When does a sheet metal prototype reveal design flaws early?
![51a6ab95581761cc26f4318be6520c15]()
Aris Katos
Future of Carbide Coatings
 When PE air column bags reduce damage in e-commerce fulfillment
![51a6ab95581761cc26f4318be6520c15]()
Aris Katos
Future of Carbide Coatings
 How energy-efficient design reduces operating costs in retail lighting
![51a6ab95581761cc26f4318be6520c15]()
Aris Katos
Future of Carbide Coatings
 When commercial aluminum storefronts make sense for a retail renovation
![51a6ab95581761cc26f4318be6520c15]()
Aris Katos
Future of Carbide Coatings
 What makes LED lights durable in high-use commercial spaces?
![51a6ab95581761cc26f4318be6520c15]()
Aris Katos
Future of Carbide Coatings
 Which industry categories offer the strongest export potential in Latin America?
![51a6ab95581761cc26f4318be6520c15]()
Aris Katos
Future of Carbide Coatings
 How to choose an ultra bright waterproof window display for storefronts
![51a6ab95581761cc26f4318be6520c15]()
Aris Katos
Future of Carbide Coatings
 How to verify suppliers on a trade portal for global sourcing
![51a6ab95581761cc26f4318be6520c15]()
Aris Katos
Future of Carbide Coatings
 How RoHS requirements should be stated in product specifications
![51a6ab95581761cc26f4318be6520c15]()
Aris Katos
Future of Carbide Coatings